Ruby and Cocoa - James Mead
James started by explaining that if you're going to create a desktop Mac app in Ruby there are a couple of choices:
- RubyCocoa. It bridges the gap between the Objective-C and Ruby runtimes. Being based on the standard Ruby VM, you don't benefit from native threading. When you package up and ship a RubyCocoa application your Ruby source code ships in the app bundle.
- MacRuby. It's an implementation of a Ruby 1.9 runtime, built on top of the CoreFoundation Objective-C libraries. There's no bridging required, and no proxying. A Ruby
Stringis anNSMutableString. You also get native threading, and can compile your app, allowing you to avoid shipping your Ruby source. Your users will require require Leopard or later, however. - HotCocoa. An extension to MacRuby, it aims to make GUI creation easy enough that you don't need to use Interface Builder. It's a thin Ruby layer that adds methods to the Objective-C objects that MacRuby wraps and leads to nice succinct code.
James recommends learning to read some Objective-C code. Reading it is much easier than learning to write it, and it allows you to understand the docs. Objective-C has some key differences to Ruby:
- Explicit pointers.
- Type declarations.
- A class's interface and implementation are defined separately.
Here's an example of a method call in Objective-C:
[sound play];
In RubyCocoa or MacRuby you'd call that method in the typical Ruby style:
sound.play
If you want to pass parameters, your Objective-C might look like this:
NSSound* sound;
sound = [sound initWithContentsOfFile: @"my.mp3"
         byReference: NO
];
Here's the same call in RubyCocoa:
sound = NSSound.initWithContentsOfFile_byReference(
    "my.mp3", false)
And in MacRuby (which is using Ruby 1.9 method call syntax):
sound = NSSound.initWithContentsOfFile(
    "my.mp3", byReference: false)
James then showed us how HotCocoa can reduce the amount of code you need to write. A simple HotCocoa app has a simple directory structure:
helloworld/
+ config/
|-+-build.yml
+ lib/
| +-application.rb
| +-menu.rb
+-Rakefile
+-resources/
  +-smiley.icns
Your application code lives in application.rb, and (should you need it) your application's menu is defined in menu.rb. HotCocoa certainly seems as though it will simplify the life of a MacRuby developer.
So how do you test all this stuff? Unit testing isn't too hard, but acceptance testing is more difficult. You can use the Mac's Universal Access feature to automate the delivery of key strokes or mouse clicks to any program, even if it doesn't expose a proper AppleScript interface. It all sounds very clever, but I think you'd need to try it out to see what's really going on.
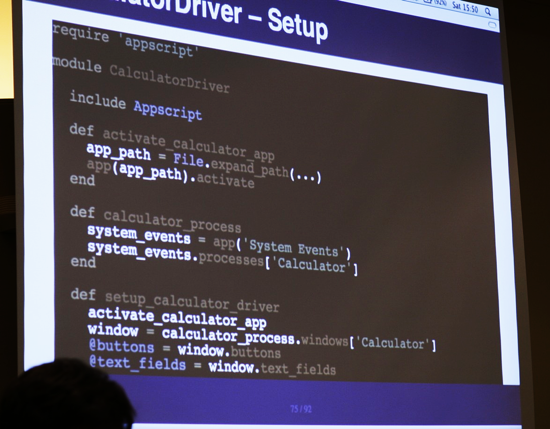
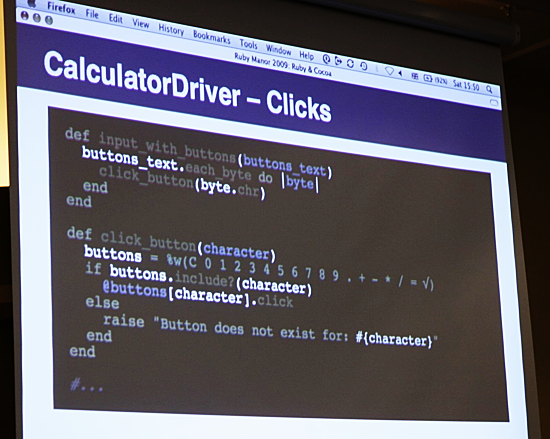
Hopefully James will put his slides online so you can see how he automated the acceptance testing -- he showed us a demo test suite that he wrote for the HotCocoa calculator app. It was quite amusing watching a script driving a calculator; it's much like testing a web site with Selenium or WebDriver.
Here's some of the code, to give you a flavour:
You can follow James on Twitter at @floehopper.
More talks from Ruby Manor
- Browser Level Testing - Martin Kleppmann
- Data Visualisation with Ruby - Chris Lowis
- Denormalising Your Rails Application - Dan Lucraft
- gem that - James Adam
- Introduction to Rango - Jakub Šťastný
- RubyGoLightly - Eleanor McHugh
- Secrets of the Standard Library - Paul Battley
- Short Order Ruby - Ben Griffiths
- Testing Third Party HTTP APIs - Richard Livsey and Bartosz Blimke
- The Joy of Painting with Ruby - Jason Cale
- Ruby Manor 2008 morning session and afternoon session